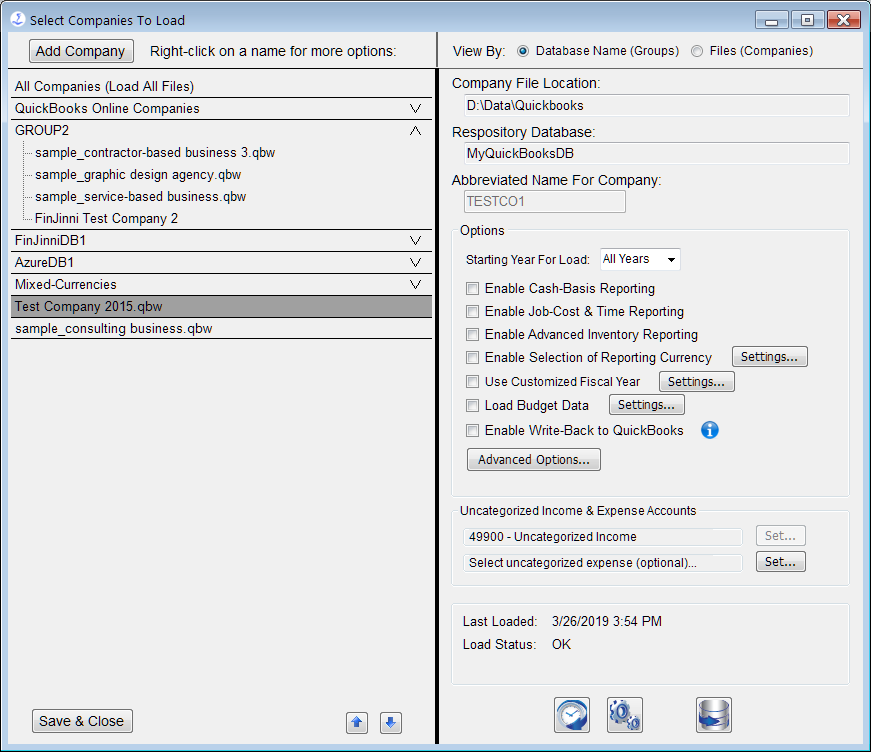
All extracts that you have added will be listed on the left side. The settings for the selected extract are displayed on the right.
If you’re using FinJinni’s consolidated reporting, you can define groups of companies as shown above. Any one company can be in multiple groups.
To add a new company file, press the Add Company button. The screens displayed will be the same as described in “FinJinni First Time Setup”.
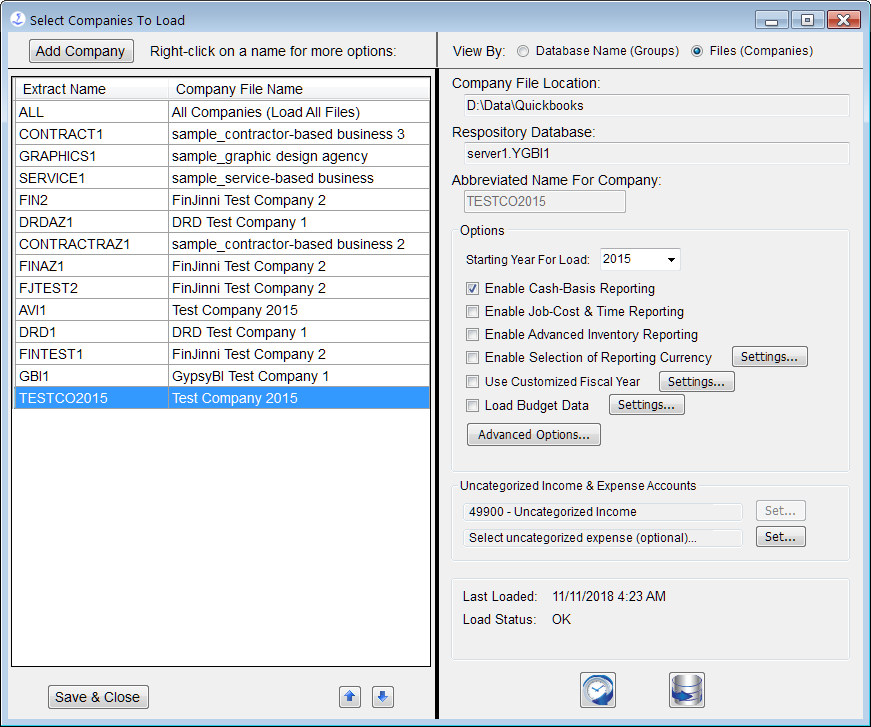
If you are only reporting on separate companies, you can use the display as shown or select the View By Files radio button on the upper right of the screen to get a list view:

Important Options
There are two settings that are important for reliable reporting:
- Enable Cash-Basis Reporting: You must select this before extracting if you will be using cash-basis reporting. For a QuickBooks Online company, there will be a Settings button:

See the section “Cash Reporting Settings” below for a description. For QuickBooks desktop, no additional settings are required.
- Uncategorized Income Account: Certain income is not categorized when received. Normally, FinJinni will select the account QuickBooks uses for uncategorized income. You can change that here for special cases.
Other Options:
Other options are used for specialized reporting:
- Starting Year for Load: Normally, FinJinni will load all historical data available in the QuickBooks file on the first load. After that, only incremental changes are loaded when a refresh is performed. However, the first load can take a considerable amount of time (from ½ hour up to several hours) if you have a large amount of data in QuickBooks. You can use the starting-year option to restrict the load of information starting with the year specified. FinJinni will obtain a starting balance for balance-sheet accounts at the beginning of that year and only load transaction data starting at that date.
Note: If you are using a non-calendar fiscal year, this selection is the fiscal year number.
- Enable Job-Cost and Time Reporting: You must select this if you want FinJinni to extract payroll costs and employee time by job from QuickBooks.
- Enable Advanced Inventory Reporting: You must select this if you want FinJinni to extract Advanced Inventory data from QuickBooks. There are several additional options you should review and set as necessary. See the following section for more information.
- Enable Selection of Reporting Currency: For multi-currency companies, allows the reporting currency to be selected at the time a report is created. See the section “Using Multiple Currencies” for more information.
- Use Customized Fiscal Year: Use this to have FinJinni recalculate the financial data based on a fiscal year other than what is set in QuickBooks. See the following section for more information.
- Load Budget Data: You must select this if you want FinJinni to extract budget data from QuickBooks. The setup for this option is described below.
- Enable Write-Back to QuickBooks: Select this option if you will be using FinJinni to update QuickBooks by posting Transactions, as described later in this document. If you leave this option unchecked, FinJinni will only read from to your QuickBooks company and never write transactions back, even if you set up data files to upload.
- Advanced Options: Additional options that are less frequently used. See the section below on these options for information.