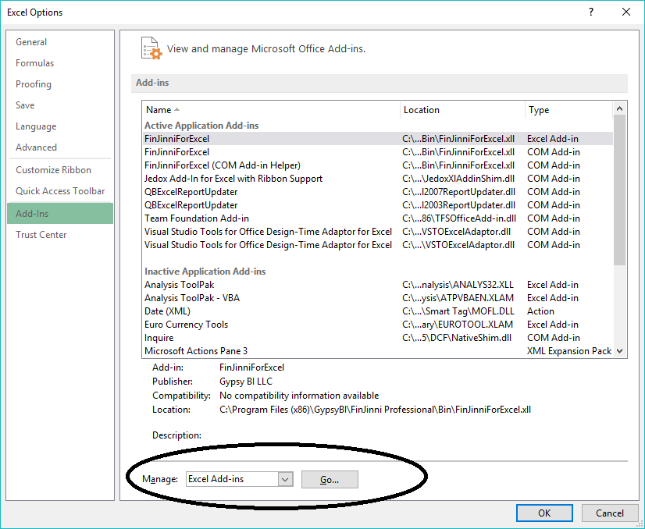
One this is done, open Excel and go to File, Options, Add-Ins in Excel. At the bottom of the
screen, click the Go button next to “Manage: Excel Add-Ins”. There will be a list and a Browse
button on the right. Click it and browse to this folder:
H:\ GypsyBI\FinJinni Professional\Bin
You should see a file in the list called ForJinniForExcel.xll – select it and press OK. If Excel asks
you whether you want to Copy FinJinniForExcel, chose No.
“FinJinniForExcel” should now appear in the list. Press OK. FinJinni should now appear on the
Excel menu bar.
If you get an error about a missing folder, that folder will need to be created by hand. Save the
location, close Excel, and create that folder.
If you need assistance with any of this, please contact FinJinni support by email at
“support@gypsybi.com”.
Here is what the Excel options screen looks like:
